Learn how to align and secure insoles for the best foot support. Plus, discover how often to replace them and how to make them last longer. Written by an experienced user, this easy-to-follow insole tutorial helps you get the most out of your footwear comfort and support.
Introduction:
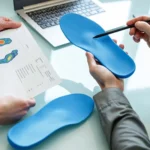
Putting insoles into your shoes might seem like a small step, but it can make a world of difference especially if you’re dealing with foot pain, plantar fasciitis, flat feet, or just need extra cushioning. Whether you’re using orthotic inserts, gel insoles, or foam cushions, knowing how to place them properly ensures they actually work as intended. A well-fitted insole can drastically improve comfort, alignment, and even help reduce knee, hip, or back pain over time.
As someone who has worn and recommended insoles for years especially while dealing with long workdays, foot fatigue, and high arches I’ve learned how critical it is to install them properly. In this guide, I’ll walk you through exactly how to put insoles in shoes, step-by-step, using an easy, expert-backed approach. We’ll also cover how to trim them if needed, when to replace old ones, and how to make them last longer.
Try double-sided tape or adhesive insoles to keep them in place securely.
Why Proper Insole Placement Matters:
You might be surprised to learn that incorrect insole placement can lead to more harm than good. An ill-fitted insole can throw off your foot alignment, leading to blisters, arch pain, or ankle strain. Worse, it can negate the benefits of your orthopedic or comfort-focused insert.
When your insole fits just right, it enhances your shoe’s fit, supports the right pressure points, and helps distribute weight more evenly. That means better posture, more energy, and less stress on your feet during long walks or runs.
Whether you’re breaking in new sneakers, using work boots, or looking to extend the life of your shoes, putting your insoles in properly is the foundation to all-day comfort.
Step-by-Step: How to Put Insoles in Shoes Correctly:
Proper alignment keeps the arch in the right place especially important if you’re using orthopedic insoles or need arch support.
1. Remove the Original Insoles (If Possible): Most shoes, especially athletic and casual types, come with factory insoles that can be removed. Gently pull them out by gripping the heel and lifting toward the toe. If they’re glued in, don’t force it just place the new insole on top. But remember, layering too much can make the shoe tight.
2. Align Your New Insoles Inside the Shoe: Place the new insole inside your shoe, starting with the heel area. Make sure the back of the insole fits snugly against the shoe’s heel cup. Press it down gently toward the toe to check the fit. If there’s any bunching or folding, it might need trimming (we’ll cover that next).
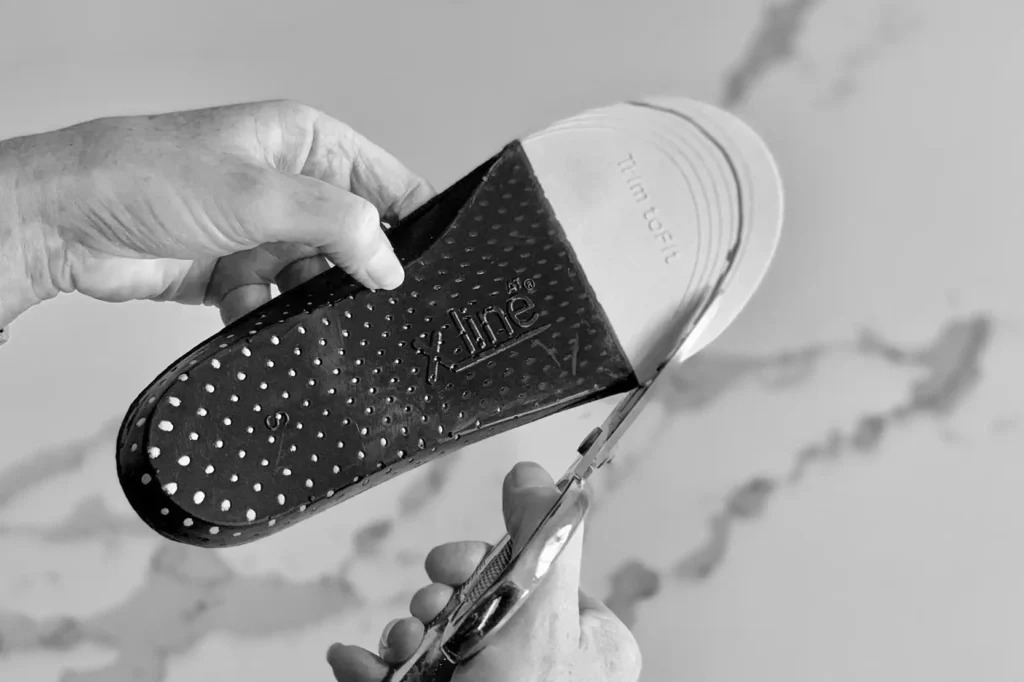
How to Trim Insoles for a Perfect Fit:
Not all insoles are one-size-fits-all. Some come with cutting guides printed on the bottom. Cutting too much too soon can ruin the insole’s shape, so go slow and test after each cut.
- Use the original insole as a template. Place it on top of the new insole and trace the outline.
- Trim slowly and carefully. Start at the toe area and use sharp scissors.
- Test the fit before finalizing. Place the trimmed insole inside the shoe and walk around.
Common Mistakes to Avoid When Putting in Insoles:
One of the most frequent errors is not removing the original insoles when you should. This can cause tightness and reduced toe room, especially in athletic shoes. Another issue is trimming the insoles unevenly, leading to discomfort or improper posture.
Also, don’t forget to break in new insoles. Walk around at home first before heading out on a long day with them. Your feet may need time to adjust, especially if the arch support is firmer than what you’re used to.
How Often Should You Replace Insoles:
Even high-quality insoles wear out. On average, replace your insoles every 6 to 12 months depending on how often you wear the shoes. If you’re a runner or on your feet all day for work, check them sooner. Watch for signs like worn-out heel cushions, flattened arches, or increased foot pain. These are clear indicators it’s time to swap in a fresh pair.
Tips to Make Your Insoles Last Longer:
Taking care of your insoles extends their lifespan and keeps them working effectively.
- Rotate your shoes so the same insoles aren’t overused daily.
- Air them out after each wear to reduce moisture build-up.
- Wipe clean regularly using a damp cloth or gentle soap if necessary.
- Avoid machine washing it can ruin the material and shape.